As a former teacher who used chalkboards rather than whiteboards or smartboards, I love the idea of an easel chalkboard card! Check out how to make it, in 10 easy steps:
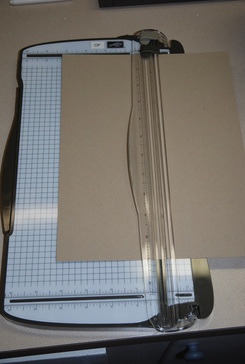
1. Use a Trimmer to cut an 8.5 x 11 piece of Crumb Cake cardstock in half lengthwise at 4.25 inches.
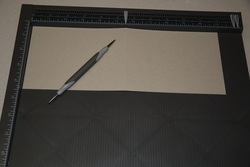
2. Use a Scoring Tool and Stylus to score the card in half. The marker marks the score at 5.5 inches.

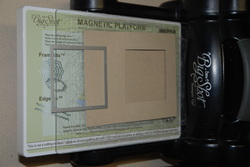
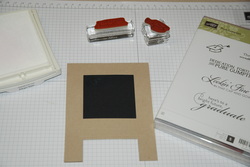
3. Open the card up to use a Square Framelit to cut the window out.
4. Close the card and use the same Square Framelit to cut the bottom out of both sides of the card bottom.
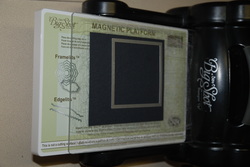
5. Use a bigger Square Framelit to cut out the chalkboard and then adhere behind with a 2 Way Glue Pen.
6. Use the Pure Gumption stamp set and White Craft Ink to stamp the cap and phrase.
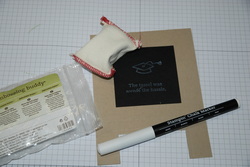
7. Use an Embossing Buddy to tap on the Basic Black Cardstock for the erased chalk look. I also used the Chalk Marker to line the edges of the chalkboard.
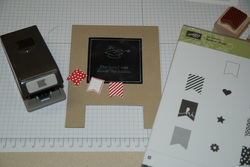
8. Using the Banner Blast stamp set, I stamped five banners in Real Red ink and then punched with the coordinating Banner Punch (FREE during Sale-a-bration).
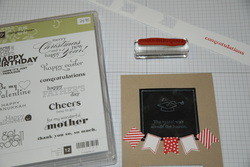
9. I then used the "congratulations" stamp from the Delightful Dozen stamp set and stamped on Whisper White cardstock.
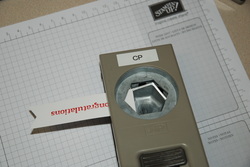
10. The Hexagon Punch is great for making banner edges.
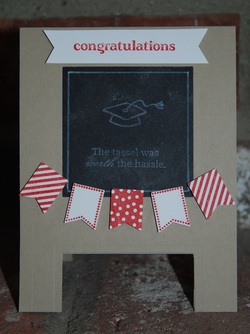
And here is the finished product for my first easel chalkboard card! Definitely looks harder than it is! And I am sure any graduate would love this to celebrate their accomplishment!