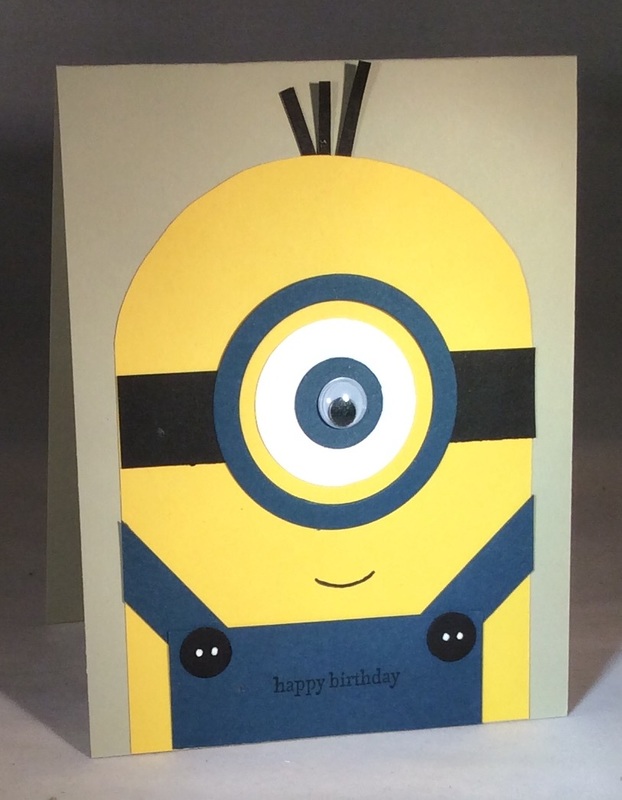
| This month, I am participating in a Creative Challenge where each day I am to create something according to a particular prompt. Today, the prompt is "Sunday Funday" and since I have young boys, I immediately thought on Minion-speak, the made-up language from the movie my boys like to mimic. I have made Minion cards in the past, but I sold them all and need to re-stock for a craft fair later this month. And last time I made one, I failed to write down specifics on how I made it. So, I pulled up a picture of one I had made in the past and struggled trying to recreate the shapes and sizes. Hence, I decided to create this brief tutorial on how I made the card for easy reference next time...and to spare you all the headache if you try to create your own! |
- Start with a 8.5 x 11 piece of Sahara Sand cardstock and cut in half lengthwise. Then score and fold at 5.5 inches.
- Cut a piece of Daffodil Delight cardstock to 3.5 x 5.5. I then used a 3 3/8 circle framelit to serve as a template to trace with pencil around the top and then cut the rounded head with scissors.
- Cut a strip for the glasses in Basic Black at 3.5 x .75 inches.
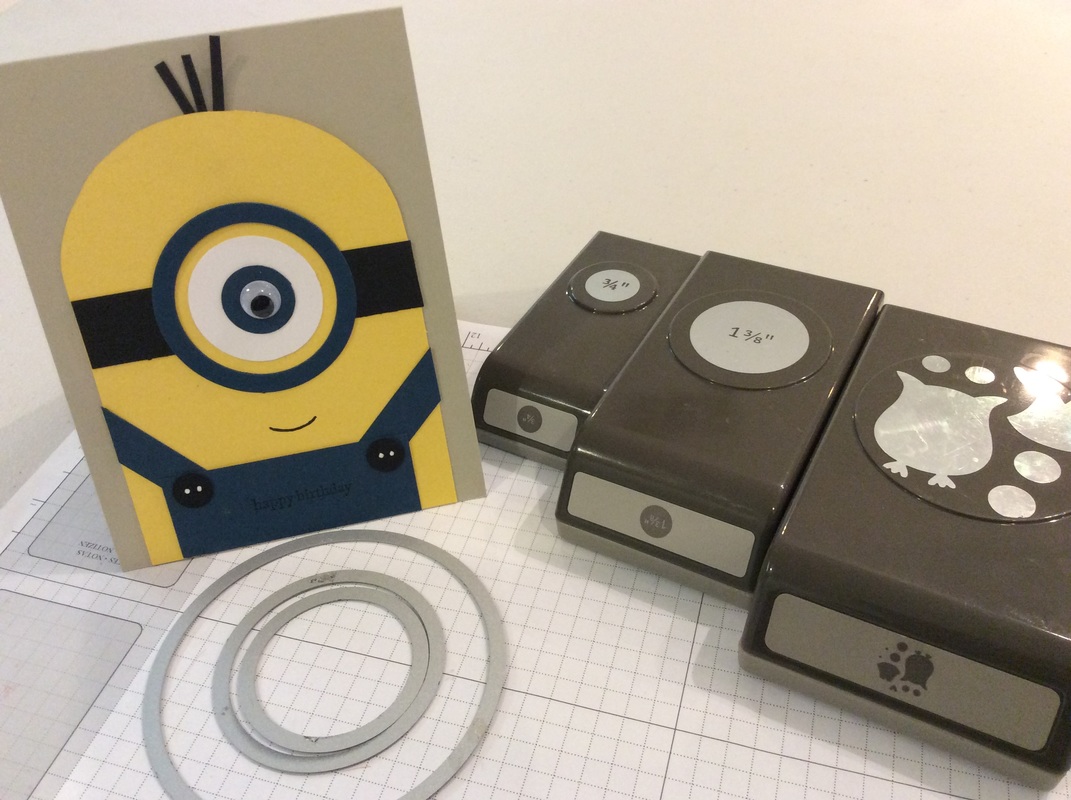
- For the glasses, I used retired Not Quite Navy. Using the 2nd and 3rd smallest circle in the Circle Framelits, I ran through the Big Shot simultaneously, making sure to use the Magnetic Platform so they stay in place.
- The eye is a 1 3/8 inch circle punched in Whisper White, with a 3/4 inch circle punched in Not Quite Navy and a large googly eye in the center.
- The overalls are 1 x 2.75 inches with scraps for the suspenders. The buttons are using the circle in the Owl Punch with details added using a white gel pen.
- The greeting is stamped in black ink using the Happy Birthday from the Teeny Tiny Wishes stamp set.
Let me know if you make your own Minion card, like this or differently.
Happy Sunday Funday!
Happy Sunday Funday!


